Slide Technique Overview
We're going to take a look at one of the more basic guitar techniques. The slide is used to transition between two notes, and also to decorate notes.�
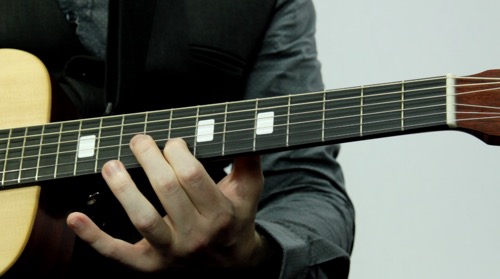
This technique is a fret-hand technique, and it's also a single-string technique. So the best way to practice this is going up and down a single string.
Let's try the slide on our C major scale going up and coming back down.
Now we can slide through notes. We'll slide from C straight to E, then back down to D and from D straight to F. This is called playing the scale in thirds.
Last, we'll try to slide from the low "C" to every note, to build our accuracy.
The slide technique is just one building block, but once you've really mastered it, it will form the foundation of solid guitar technique.�
How to Slide
Not to be confused with slide guitar, slides are a technique used on guitar and other stringed instruments to connect notes up and down a single string. Let’s start by executing a basic slide.
- Fret the second string at the VIth fret with your first finger.
- Pluck the note.
- While the note rings, slide your finger to the Vth fret. You must continue to push the string down for the duration of the slide. If you ease the pressure with your fret hand, the slide won’t work.
- You can slide from any note on a given string to any other note on that string, and the frets in between will note be heard as individual notes, if you do it fast enough.
Your note at the VIth fret (“F”) should have “slid” into the note at the Vth fret (“E”)—without the second note being plucked at all. The slide is a decorative technique that can add some interest to your melodies and lead guitar playing.
Slides are also frequently used to change positions. If you were playing in the position of the VIth fret in the example above, and you slid down to a note at the Vth fret, now your whole hand has been moved by one half step, giving you access to new notes—all without any musical interruption.
Slides belong to a class of techniques that only work on single strings. You can’t “slide” from one string to the next. Therefore, the best way to practice slides is by sliding through scales and patterns on a single string.
To imagine the physical action of the guitar slide, pretend you are trying to squeeze shut and close a ziploc bag. This action is roughly the same as a guitar slide. Depress, maintain force, and move along a straight line.
Example Scale for Sliding


Sliding Exercises
For these exercises, we’ll be using our C major scale on the B string.
Exercise #1 – Basic Technique
Summary: Play the scale ascending and descending, using slides.
Explanation: Play C at Ist fret, slide up to D. Play D and slide to E. Continue to the high C, and then reverse the direction by picking the high C, then sliding down to B.
Exercise #2 – Variation
Summary: Play the scale in thirds, using slides.
Explanation: Play C at Ist fret; slide all the way up to E without stopping at D. Play the E, slide down to D. Play the D, slide up to F. At the high C, reverse direction.
Exercise #3 – Develop Accuracy
Summary: Practice slides of all shapes and sizes in C major.
Explanation: Play the low C, slide up to D. Play the low C again, slide up to E. Repeat until you play the low C and slide all the way up to the high C. Reverse by sliding from high C to B, then from high C to A and so forth, until you’ve slid from the high C, down an octave to the low C.
 As the creator of Hub Guitar, Grey has compiled hundreds of guitar lessons, written several books, and filmed hundreds of video lessons. He teaches private lessons in his Boston studio, as well as via video chat through TakeLessons.