3-Octave Scale
I'm Grey and this is Hub Guitar
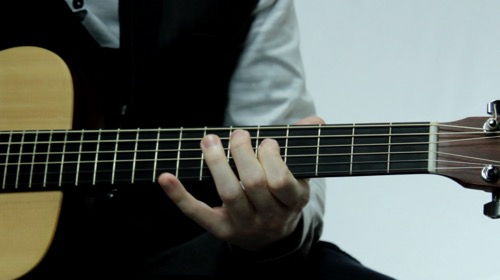
The total range of the guitar is more than three octaves. So you can play some big scales on the guitar. And practicing scales in three or more octaves is a great way to get a command of the guitar neck because now you're practicing in a way that forces you to keep making position shifts.
Because this exercise pushes for as much range as possible, we're going to start it on the low F and play an F major scale up the neck. Actually, you could do this in any key; for instance, you could do this in C major, but from F to F.
Here's a 3-octave F major scale:
Once you're comfortable making those position shifts, try changing it to other keys like C major and G major. For instance, you can change this exercise to C major by raising the Bb to B. And you can change the C major version to G major by raising the F to F#.
What's going to happen after a while is you'll be playing somewhere on the neck and you'll suddenly notice you have the freedom to play up and down the whole neck.
So instead of being stuck in one position, you can go all the way up and down. If you can move up and down the neck in any key, you're taking your fretboard knowledge in the right direction.
The guitar’s range is wide, spanning across more than three octaves.
This exercise is a 3-octave major scale beginning on the lowest “F” of the guitar.
Practicing the scale in this wide range will help you to start to see the notes on the guitar as one big connected piece as opposed to many unrelated parts.
You’ll also start to get an understanding of when and how to shift positions. Shifting positions is very important if you want full control of the guitar neck, but it can be a bit disorienting at first. Practicing a scale in 3-octaves is a great way to get used to it.
F Major – 3 Octaves


Position Shifts
As you can see, in most cases there will be four notes per string. So to practice your scales this way, just play them with four notes per string.
Ascending – Lead With Your Pinky
On the ascending part of this pattern, your first finger will lead from the first F to the first G. But once arrived there, most position shifts will be made with the pinky. After playing “C D E” on the 5th string, your pinky can slide up to the F, and now you’ve changed positions again.
Descending – Lead With Your Index Finger
For the descending pattern, your first finger will lead the way all the way back down. It will initiate every position change by moving out of position and allowing the other fingers to follow.
Key Exercises
- Learn, memorize, and apply the scales.
- Use the scale in your own music or improvisation.
- Apply this concept to other scales. If you forget about trying to play all scales from low root to high root, you can play any scale in three octaves. For instance, you could play C major from Low E on the open string to high E on fret XII of the 1st string.
 As the creator of Hub Guitar, Grey has compiled hundreds of guitar lessons, written several books, and filmed hundreds of video lessons. He teaches private lessons in his Boston studio, as well as via video chat through TakeLessons.