Fingerstyle Beginner Lesson
Hi, this is Hub Guitar.
We're going to do a basic introduction to fingerstyle. I've found that even absolute beginners can get started playing fingerstyle guitar after just 20 minutes of studying this lesson.
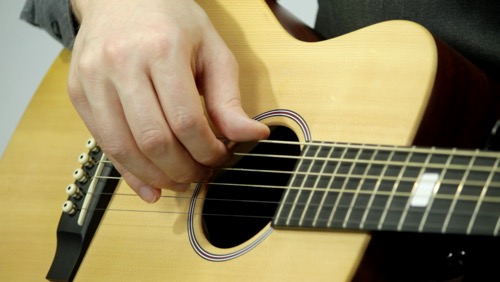
Fingerstyle just means you pluck the strings with your fingers -- not a pick. Normally you'd use your thumb, index, middle and ring. They're are abbreviated from Spanish terms: p, i, m, a. The pinky is not normally used.�
The cool thing about fingerstyle is that you'll be selecting notes to pluck with your plucking hand, so the chord shapes you make with your fretting hand can consist of both correct and incorrect notes, as you'll only be plucking the correct notes.�
Let's do a few warmups.�
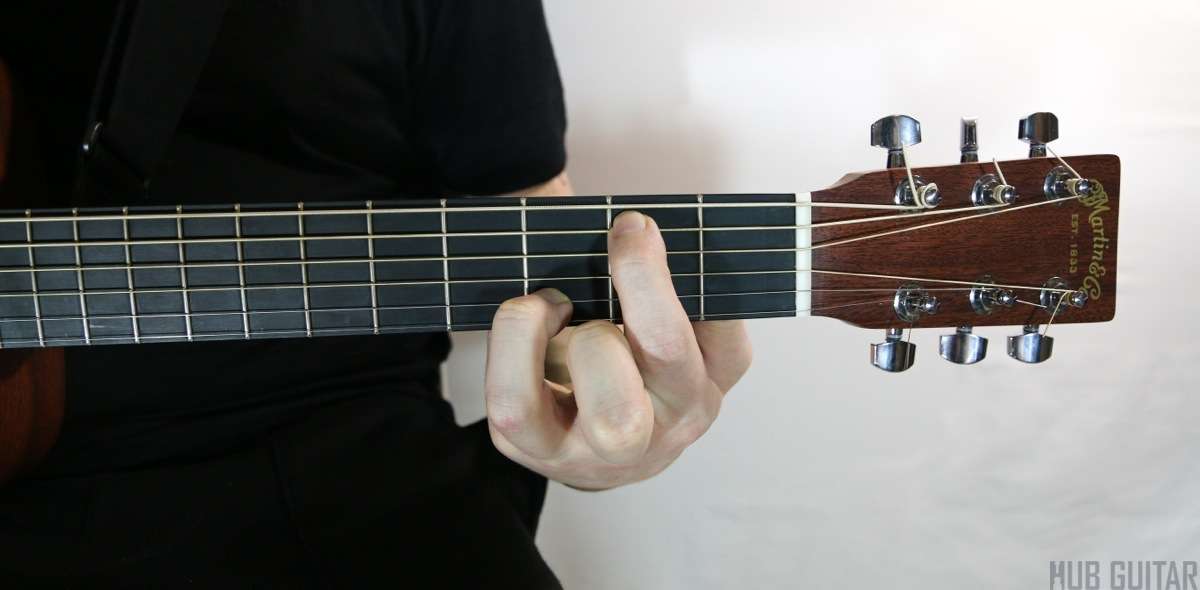
First, we're going to use a G major chord shape with an open E on the end like this. That's called a Gmaj6. And we're going to pluck a downward roll with P, I, M, A.
Now, we'll do the same thing but we'll separate the thumb; just let the thumb keep plucking the G and the other three fingers can move around.�
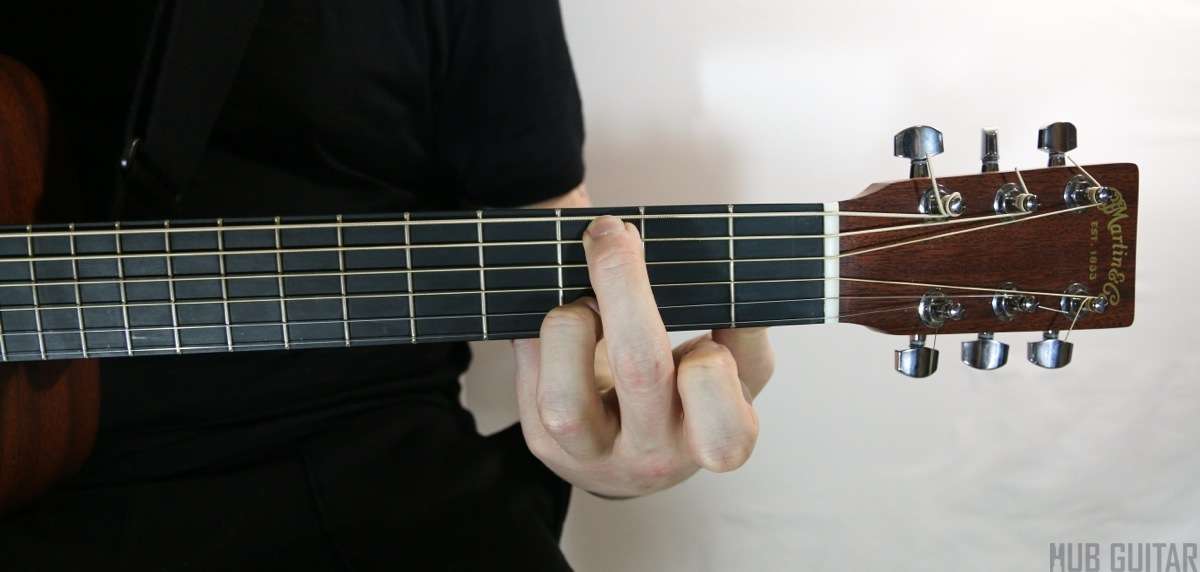
Now we'll do a forward roll followed by a backwards roll.
Now let's play a bit of music.
We're going to play a nice and easy fingerstyle pattern with a bass that moves around a little bit. The chord part will be pretty much the same. Open d, open g and D on the third fret. The bass part will go like this:
So now we'll combine them together. Bass, chord, bass, chord.
Once you get comfortable with that you may like to throw in the High E string occasionally, or even some other notes from the open position G major scale. I'm going to give you a quick example too. OK! Great! So try those patterns out for yourself and see if you can get your right hand really comfortable with those basic fingerstyle patterns and that's going to open up a lot for you to do open position chord.�
How to Play Fingerstyle Guitar
Fingerstyle guitar (sometimes fingerpicking) is a technique where the fingers of the picking hand play the strings. No pick is used. The picking-hand thumb, index, middle and ring fingers are used, and sometimes the pinky finger. Traditionally, these fingers are lettered: p, i, m, a. The thumb is p, the index finger is i, the middle finger is m, the ring finger is a. These abbreviations come from the Spanish language. (pulgar, indice, medio, anular).
Fingerstyle is a general term for using the hand to play guitar notes, and refers to styles ranging from classical to latin to country.
The goal of the fingerstyle guitarist is to play several independent musical parts at once. The bass-lineA bass-line is a series of low notes, often played on the 6th or 5th string of the guitar, which serves as an anchor for the music., chordA harmonic structure (that is, the combination of several notes) which ideally produces a pleasing sound. Chords are normally created by stacking notes in groups of thirds.s and melodyA series of pitches which form a memorable musical statement. of a song can be played altogether, with some adjustments.
The best way to begin playing guitar in this style is simply to play individual chords with the fingers. The notes of the chords can be arpeggiatedAn arpeggiated chord is a chord whose notes are played individually. In this case, even though they are plucked separately, they tend to collect and ring together.—played one at a time by each finger. The fingers can also play the notes all together.
Fingerstyle Example
Let’s start our study with a Gmaj chord. Since our example will be in the key of “G”, all tones of this chord will work—even the high “E” string, played open, which is in the key of G major but not normally in the G chord. Fingerpicking changes the ‘rules’ a little bit. This chord may not sound good if directly strummed because then its tones all “attack” together. But if it’s played with the fingers, they each begin separately and ring out; this can disguise chords that are dissonant and make them sound beautiful.
How do we approach this? Since most of us have less than six fingers on our picking hand, we’ll need to choose some tones from the chord to pick. Let’s try a few sequences.
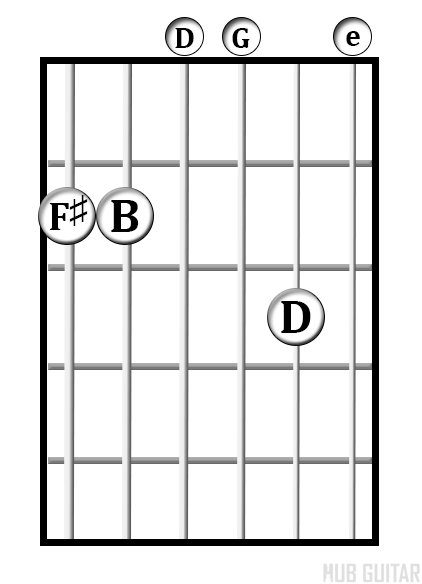
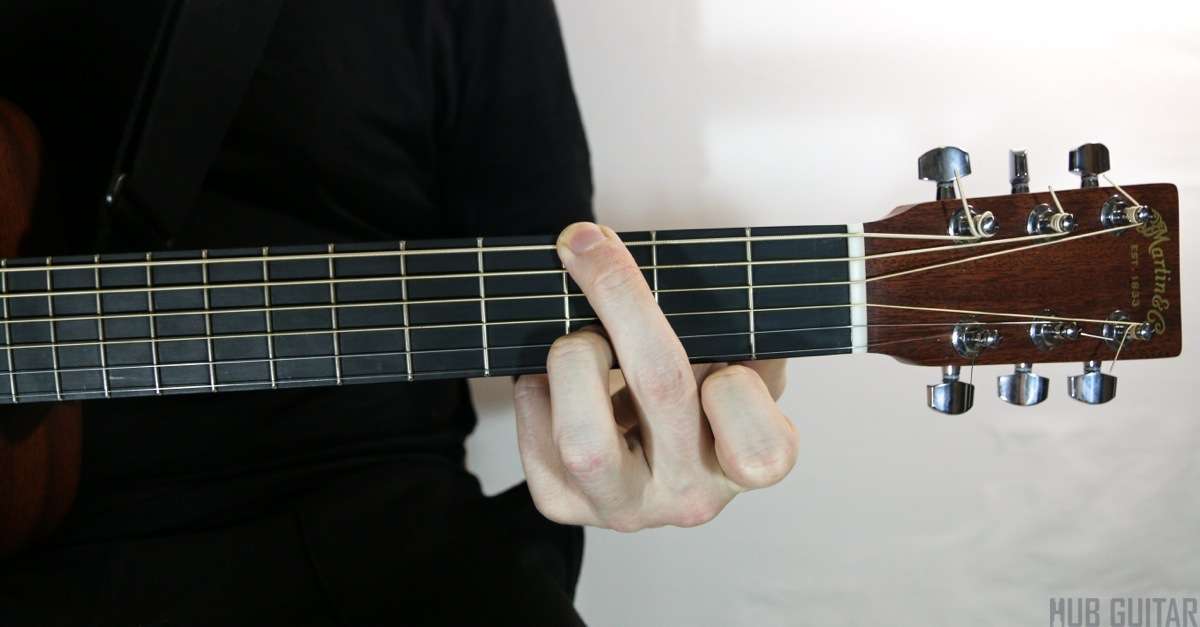
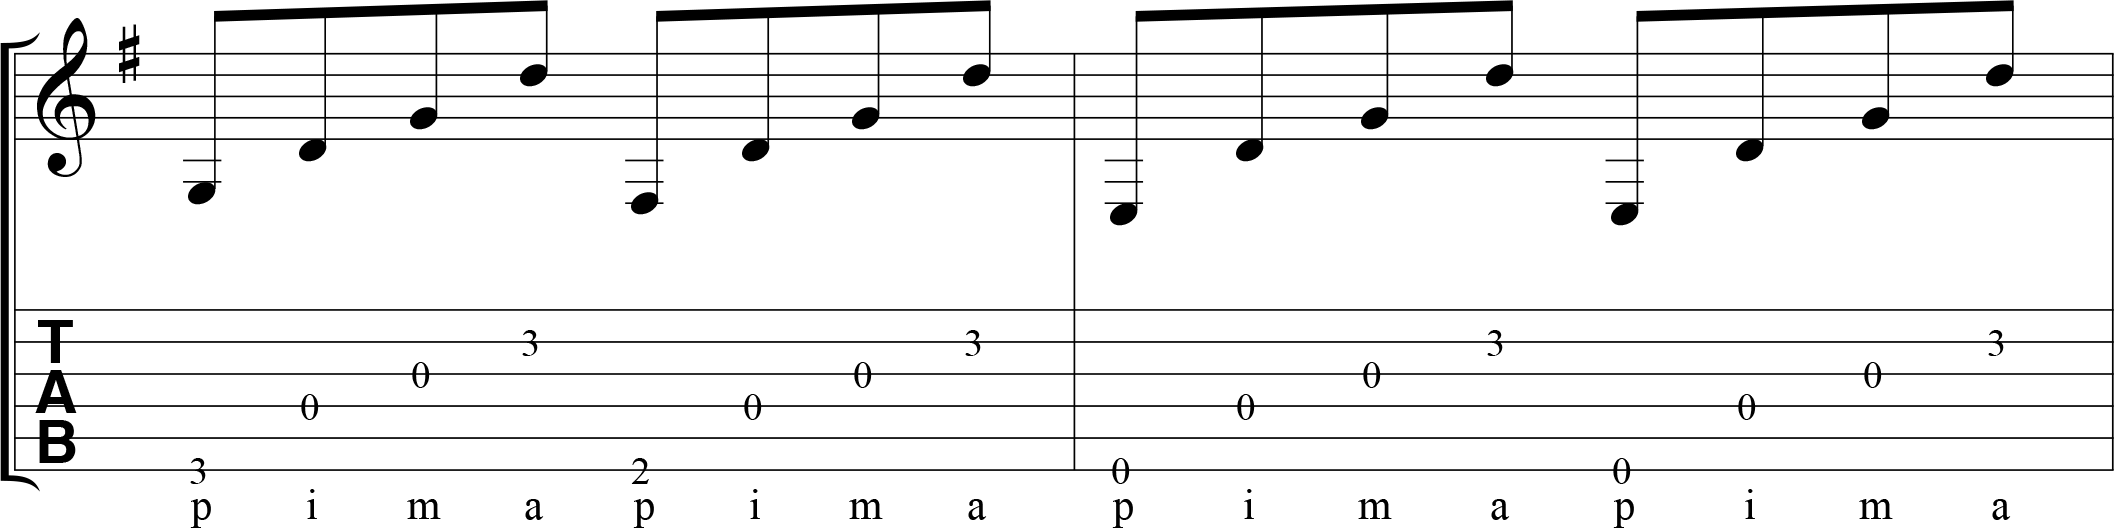
Fingerstyle Sequence 1
All four fingers moving together
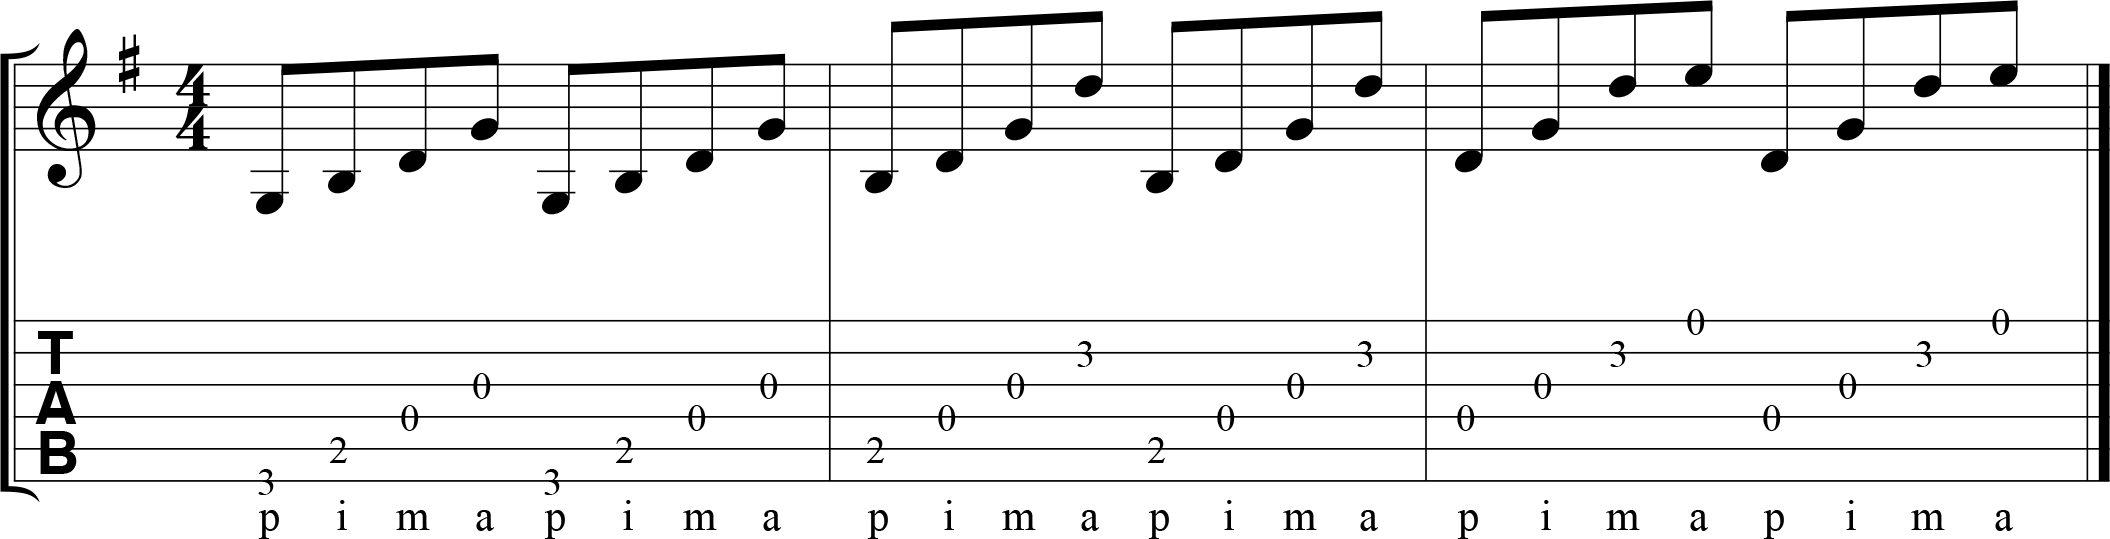
In sequence #1, all four fingers work as a team, playing each note in sequence. The thumb starts on the lowest string, and the index finger starts on the next string, and so on. When it’s time to move to the new string, all four fingers take a step down to the next set of four strings.
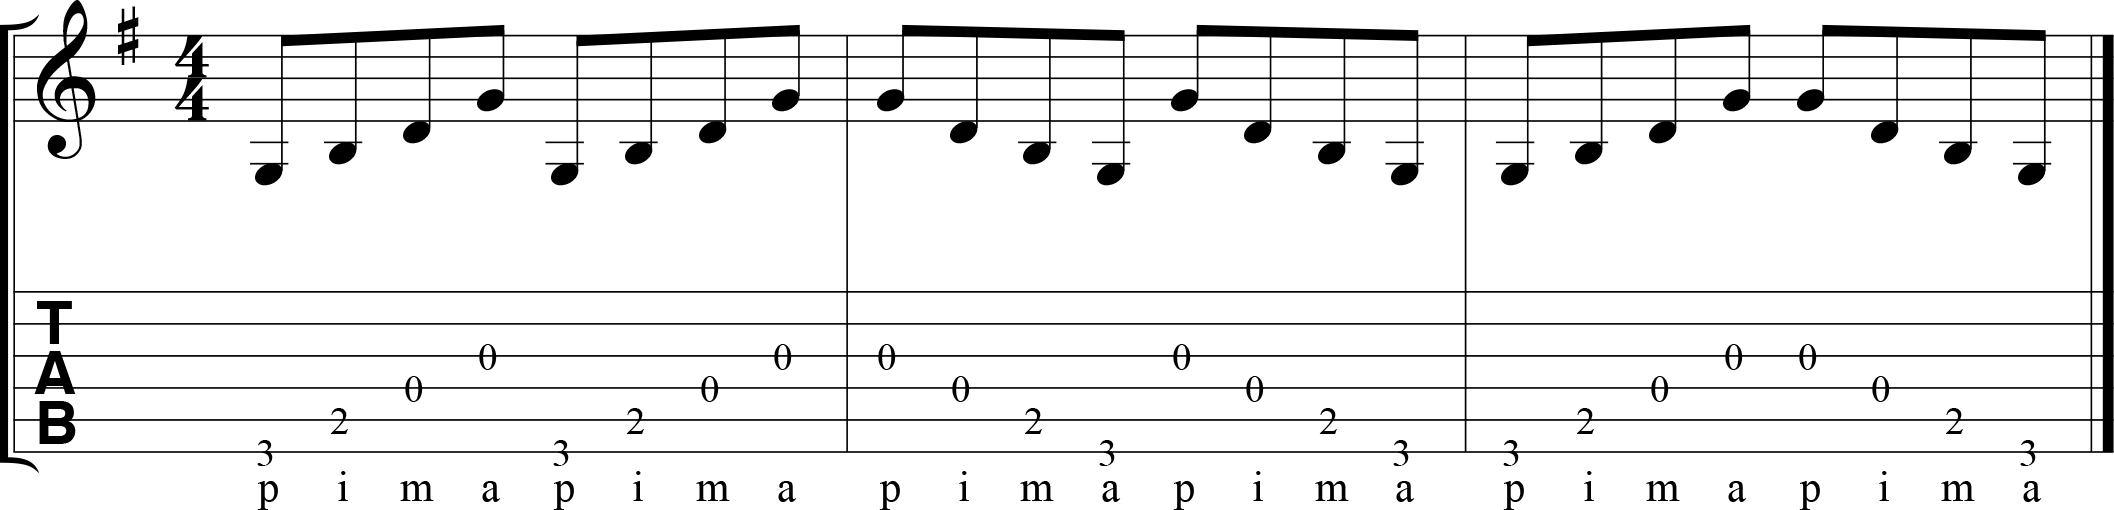
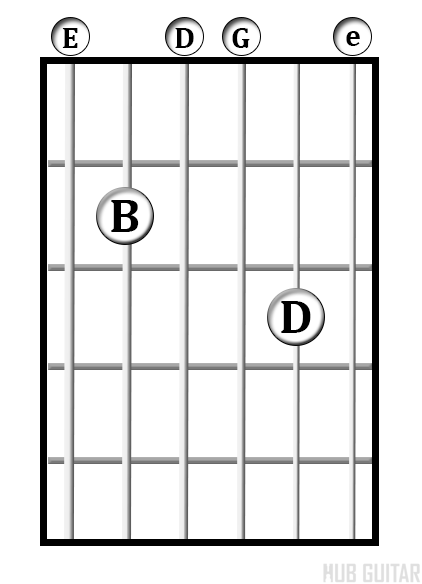
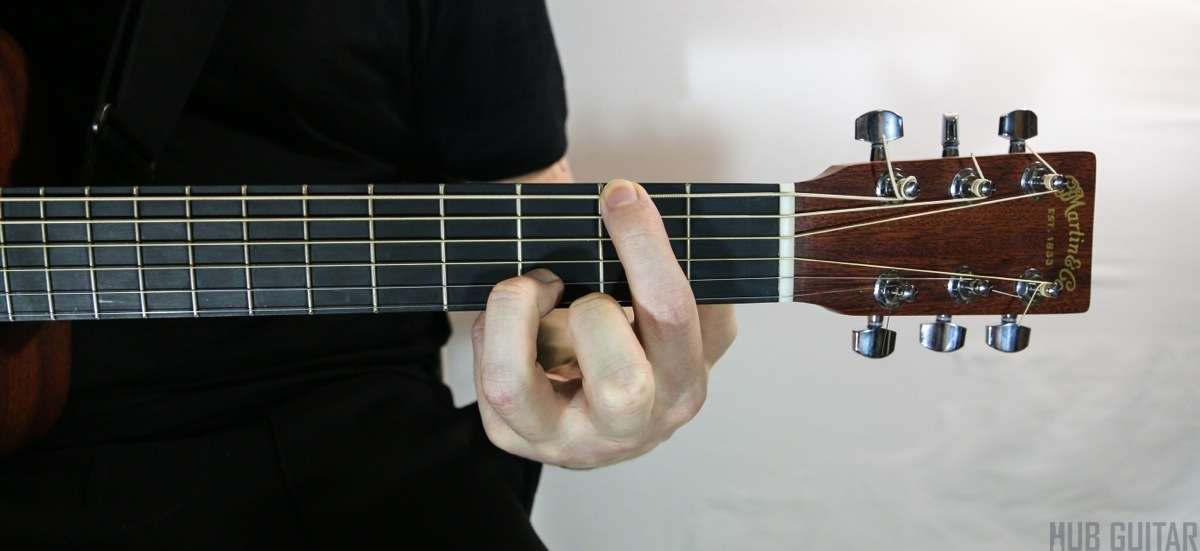
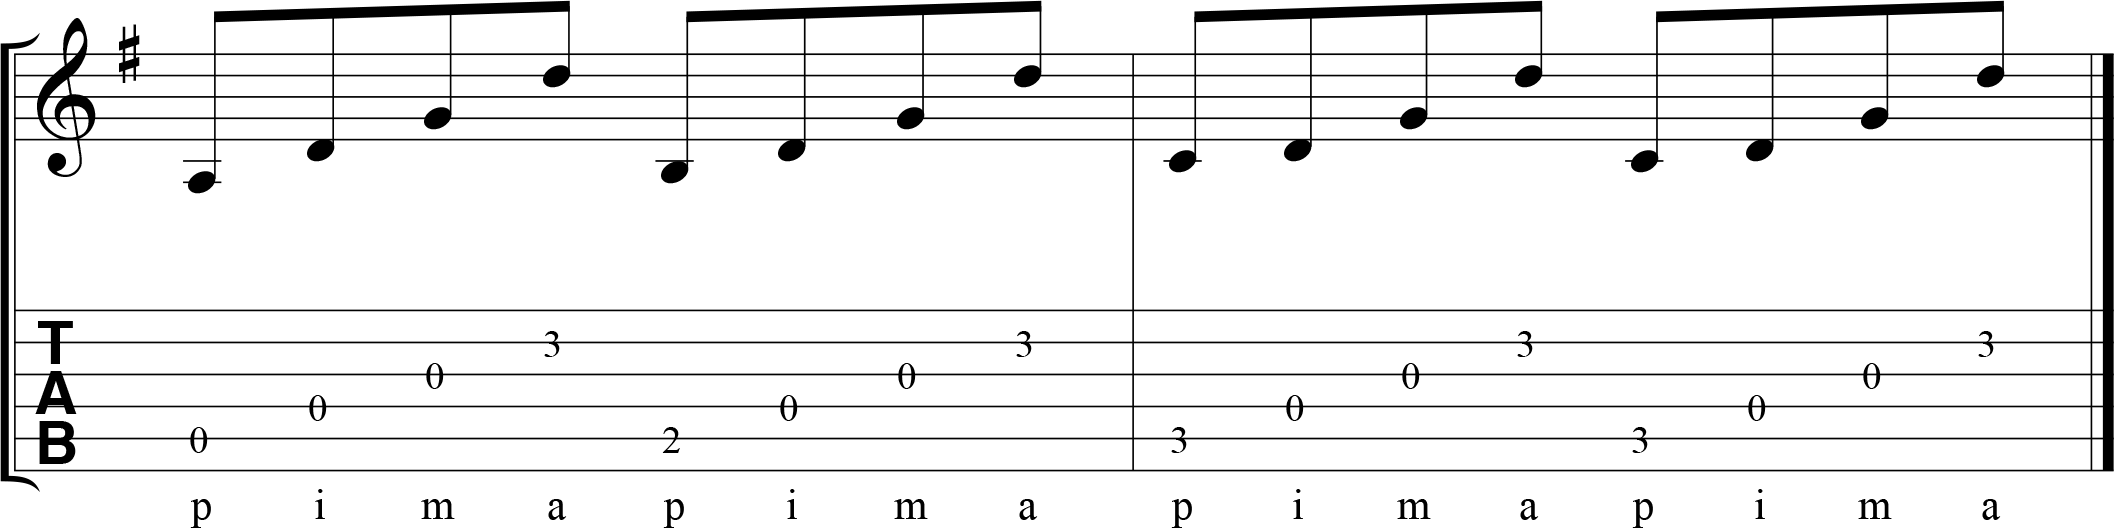
Fingerstyle Sequence 2
Thumb stays, three fingers move

In sequence #2, the thumb continues to play the bass note of the chord, G. the next three fingers work as a team like they did before, playing each note in sequence, then moving to the next set of strings and repeating. The thumb stays behind.
This technique is significant because normally the thumb will play the bass note of the chord, typically its rootThe basic note of a key, chord, or scale; the note which acts as the center and to which all other notes are compared. note. The other fingers are generally more free to play any note from the chord.
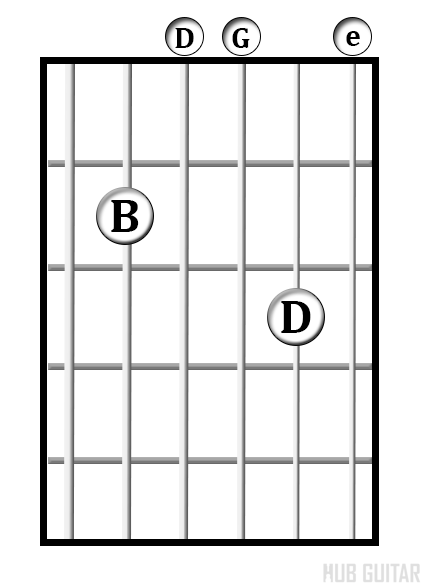
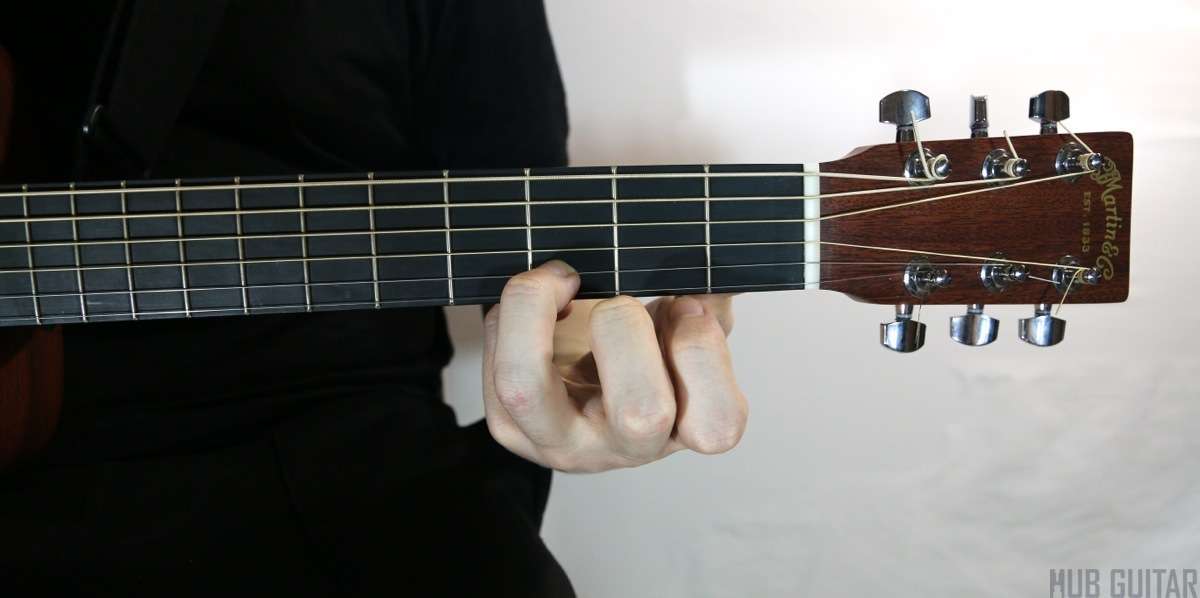
Fingerstyle Sequence 3
Four fingers move forwards, then backwards
In sequence #3, the four fingers play in sequence as before, but now they also reverse direction, so that the ring finger is first and the thumb is the last.
Once you’ve developed these fundamental motions in the picking hand, the notes of the chord can begin to change as well.
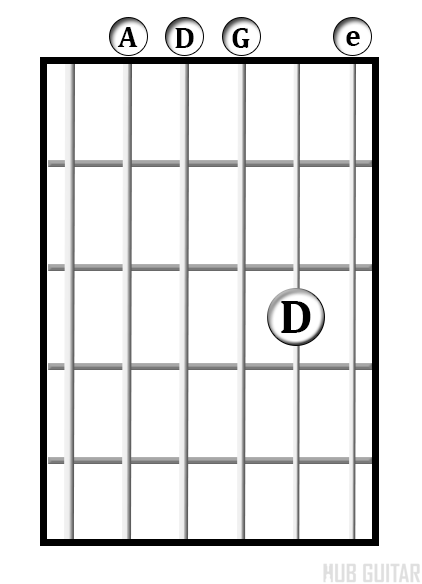
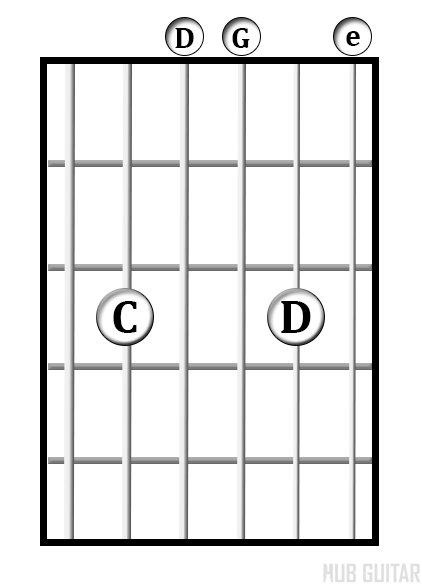
Fingerstyle Sequence 4
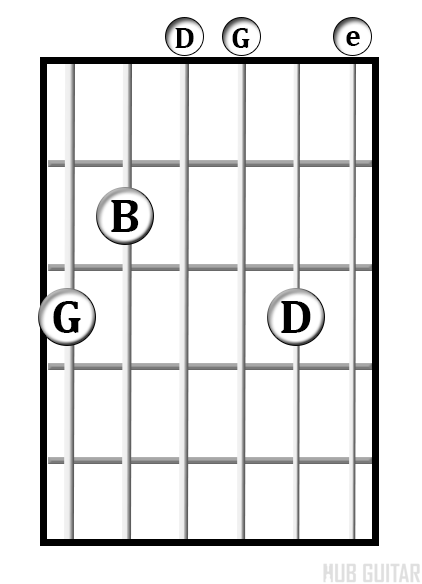
The chords used
In this last sequence, we’ll play the same three strings over and over again with the index, middle and ring fingers: the fourth string, the third string and the second string. (tones D, G and D). Now, we’ll move the bass of the chord around and create a more active, flowing chordal harmony.
The notation and tab
This example shows how even a very simple pattern can be musically interesting.
There are infinite possibilities for the fingerstyle chords. The bass part can move, the highest note or melody can move, and so can inner voices – the notes played on the strings that are neither highest nor lowest. Experiment with this technique of playing chords fingerstyle and moving voices around, and in time you’ll discover the possibilities for yourself.
Key Exercises
- Practice all four sequences until you’ve mastered them.
- Apply the sequences to another chord progression to any song.
 As the creator of Hub Guitar, Grey has compiled hundreds of guitar lessons, written several books, and filmed hundreds of video lessons. He teaches private lessons in his Boston studio, as well as via video chat through TakeLessons.